
This house is to be the first in a series of low budget, high efficiency remodels completed by Dreamcatcher Design & Build. In doing such, I have several goals in mind:
1. to reclaim a property that otherwise would fall into detritus and be a sore on it's community.
2. to "flip" the house in a few years; appealing to a 2nd time home buyer who is more discriminating than a first time home buyer would be.
3. to learn from the process that which I haven't before had the privilege to experience while working for clients.
4. to prove that high end results can be obtained on a low budget.
5. to build my professional portfolio by creating my own "show" house.
6. to make at least enough profit after the sale to buy another house and start the process over again.
I have high hopes, I know. I have received nothing but negative comments on my plan from friends and family. Most don't think I should invest in this project; "just slap on some paint and put down new carpet" is the most common advice. But, I have much more intentions.
We made the offer on the house on July 4th.
Our offer was accepted on July 6th. and we got to enter the house for the very first time (Yes, we bought a house without ever going inside). The home has "good bones" but someone had obviously tried their hand at DIY home improvement long before we got there. Unfortunately the home improvement done was actually quite poorly planned and executed. It would all have to go.

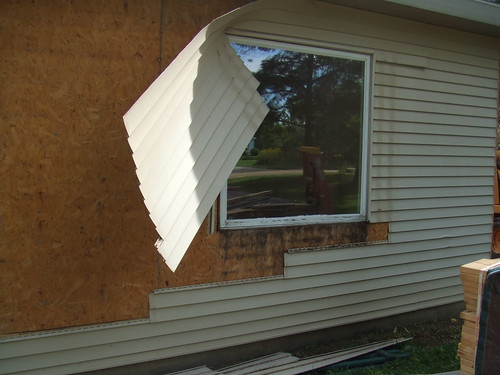
The master bedroom was added late; after a house fire destroyed the south end of the house is what we are told. It is the worst built part of the house. The drywall is cracked, the floor is heaved, and there is a leak in the roof which has made a corner of the ceiling soggy and moldy. The ceiling is cathedralized and creates a nice area but from the outside I can see that the ridge is sagging; it will all need to be replaced. To add to it all, there is a giant 5' x 5' picture window in the middle of the bedroom, pointing straight to the road and the neighboors house across the road.

The dining room is tiny, about 6' x 8' , and sits in front of the utility closet. The central heating system looks very old and has been rigged back together with tin foil. The water heater looks to be about 5 to 10 years old and appears to be salvageable. The other side of the dining room has two windows that don't match in size or style. It looks very dumb, but I can imagine adding a small bump-out in the future to gain the necessary room

The mud room/ laundry room is another DIY add-on. As you walk into the mud room, you have the option of walking straight through to the back yard, turning left and stepping UP into the garage or turning right and stepping UP into the laundry area. It is very weird and I can't say I like it but at least it should be easy to change by just raising the floor in that area and adding a step outside.

The garage is a typical garage....dirty. It has
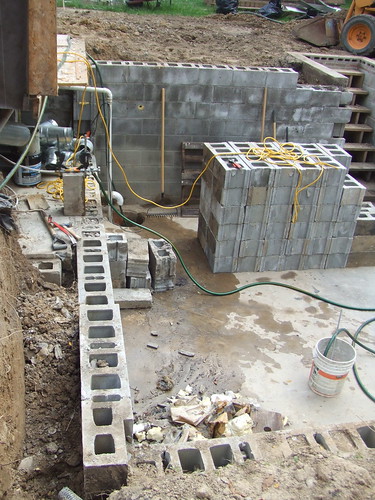
benches on two walls, cheap wood paneling and wall paper covering the walls, and a ceiling fan in the middle. The worst part is the concrete slab floor which looks as if it was poured one 80lb bag at a time and allowed to harden without any tooling. The mounds of each unleavened bags are obvious around the perimeter and at at least two locations it appears the exterior wall has been lifted and concrete poured underneath to support the wall. I will need to pour a whole new slab to remedy this.

One decent area is actually the kitchen. While the appliances are old and will need to be replaced, the cabinets and counter tops are decent. I am unsure if I will replace these or just find some way to artfully modify them. The countertops is simple laminate and will need replacement too; I guess the real redeeming feature is just that the layout is reasonable and can be lived with for awhile without major modification. But, I guess we will just have to wait and see.


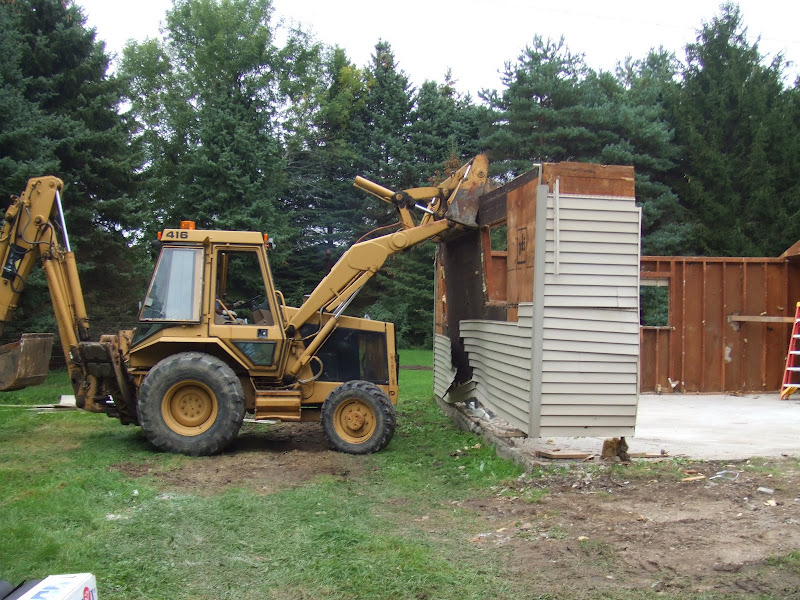
 So, the master bedroom suite has been a real challenge but will hopefully reap the greatest rewards in the end. The initial take on the master bedroom was that it was definitely a late addition and certainly poorly built. The actual facts are more disturbing than the estimation.
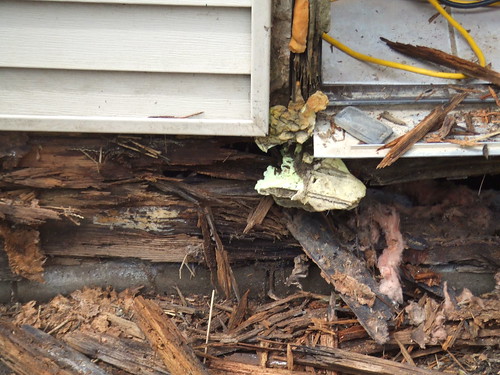


